

Welcome to our comprehensive post on the cursive writing alphabet! In this series, we'll show you how to write both lowercase and uppercase letters in cursive and connect them smoothly with other letters. Don't forget to watch the videos of each letter for a visual guide. So, let's go through the basics of learning cursive and give you an idea of how to draw the curves and flowing lines that make up this elegant script.

How to Write the Cursive Alphabet Step by Step
Cursive writing is all about the fancy, connected letters that flow smoothly from one to the next. You might see loops, tails, and other things. The key is to make your writing easy to read, consistent, and smooth.
Step 1: Start with the Lowercase Letters

The lowercase alphabet is made up of small cursive letters like a, b, and c. These letters are used most of the time in cursive writing. They flow together more and have more curves compared to the big letters. Learning these small letters helps you write more naturally and creatively in cursive. Lowercase cursive letters are connected too, but they're simpler than the capitals.
Step 2: Practice the Uppercase Letters

The uppercase alphabet includes big cursive letters like A, B, and C. These are usually used for the first letter of names, and sentences, or to show importance. They look a bit different from regular print letters, with some having fancier strokes or loops. Learning these big letters is important for writing in cursive correctly, so you can write names, sentences, and all kinds of words.
Step 3: Practice Connecting Letter

When cursive letters are joined together to make words and sentences, it's called the connecting alphabet. Most letters in cursive writing are connected to the ones before and after them. It takes practice to get the hang of making these connections smooth and pretty. That's what gives cursive its beautiful, flowing look!
Step 4: Practice Writing Words

Once you're comfortable with the letters, try writing words. Start with easy words and then move on to fancier ones.
Easy Tips for Writing in Cursive

Step 1: Hold Your Pencil Right
Hold your pencil lightly between your thumb and forefinger, and angle it at 45 degrees to the paper.

Step 2: Start Slow
When you're just starting out, take your time. Start slow and then speed up as you get more comfortable.

Step 3: Be Patient
Learning cursive takes practice, so don't rush. Be patient and keep practicing—you'll get the hang of it very soon!
Rules of Cursive Writing
All similar letters should be the same height.
All small letters should start at the top.
Good handwriting is formed by a pattern of ovals and parallel lines.
Capital letters in cursive handwriting usually shouldn't be any higher than the rest.
All downward strokes of letters should be parallel.

Where to Learn and Practice?
Go to the Writey app and click on the Cursive section. Here, you'll see different sections of the app. Stars from training and move to the next section as you feel more comfortable.


Before you begin writing the letter 'A' in cursive, it's a good idea to warm up your hand first. Think of it like stretching before exercise - it helps your muscles get ready for the task ahead. So go to the training section of Writey and practice tracing this:
Cursive A
Training
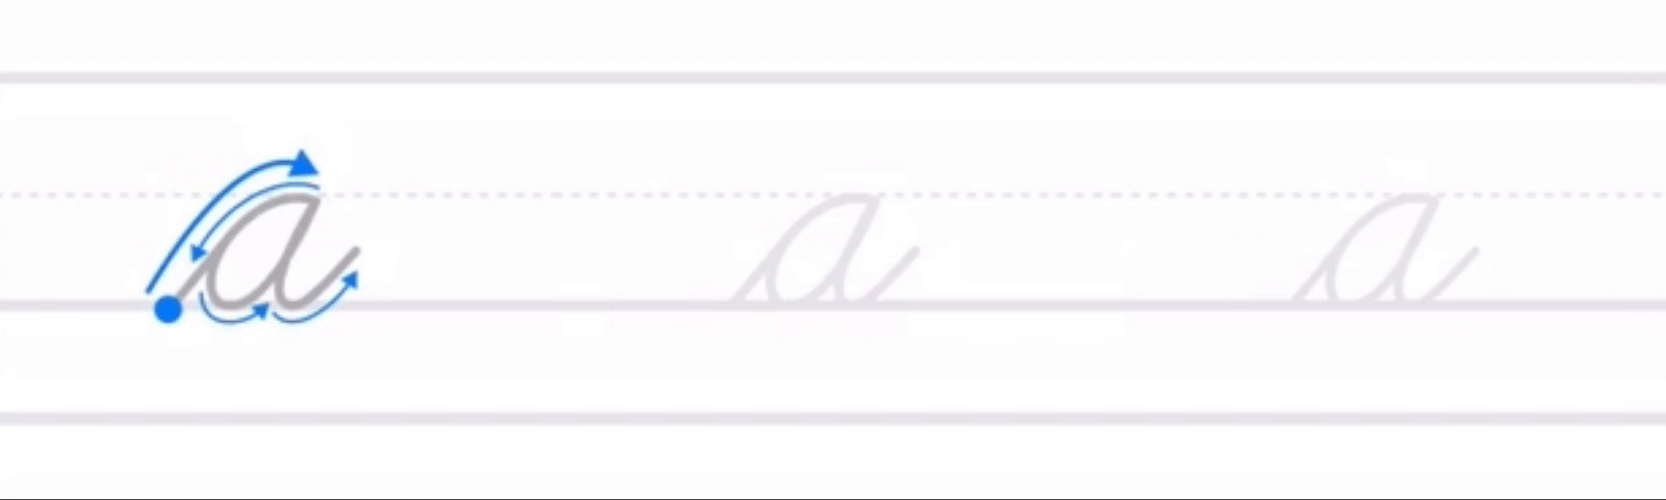
How to Write Lowercase Cursive 'a':
Writing the lowercase cursive 'a' is pretty easy and it's the first letter you'll learn. Start with a little upward curve to the right, then you loop around in a circle, going counter-clockwise. Finally, you finish with a little curved tail. Making sure each stroke looks smooth is important to keep your 'a' looking nice.
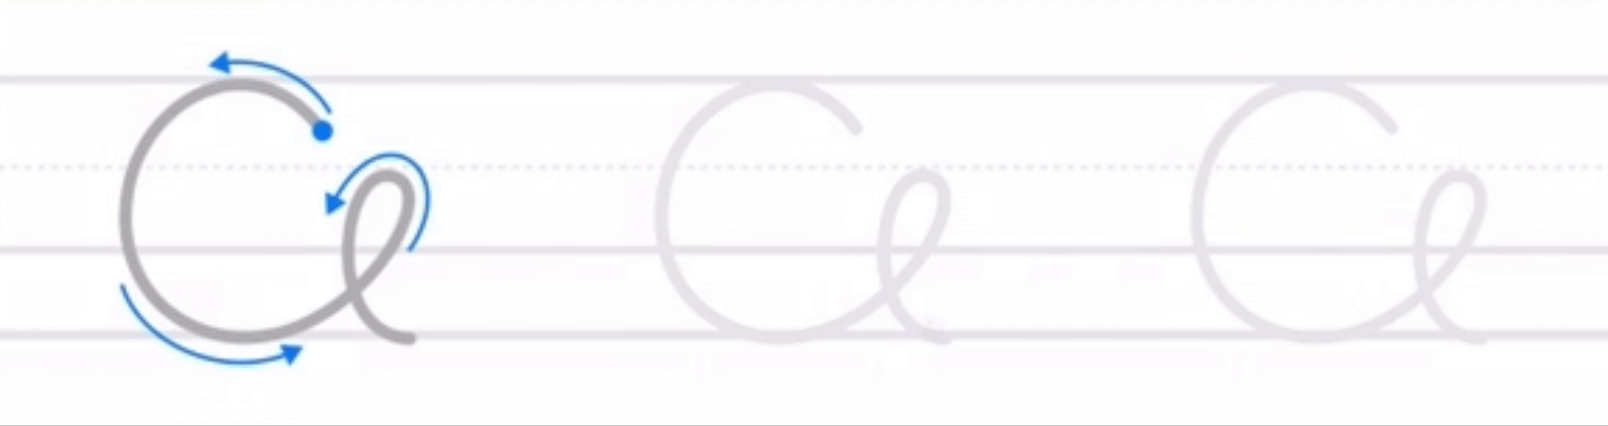
How to Write Uppercase Cursive 'A':
Put your apple pencil just above the line where you're writing. This marks where your letter will begin. Then, make a soft curve to the left, shaping the top of the 'A'. Next, smoothly curve downwards to the right, and finish with a straight line at the bottom. These careful strokes create a lovely, looped capital 'A' in cursive.
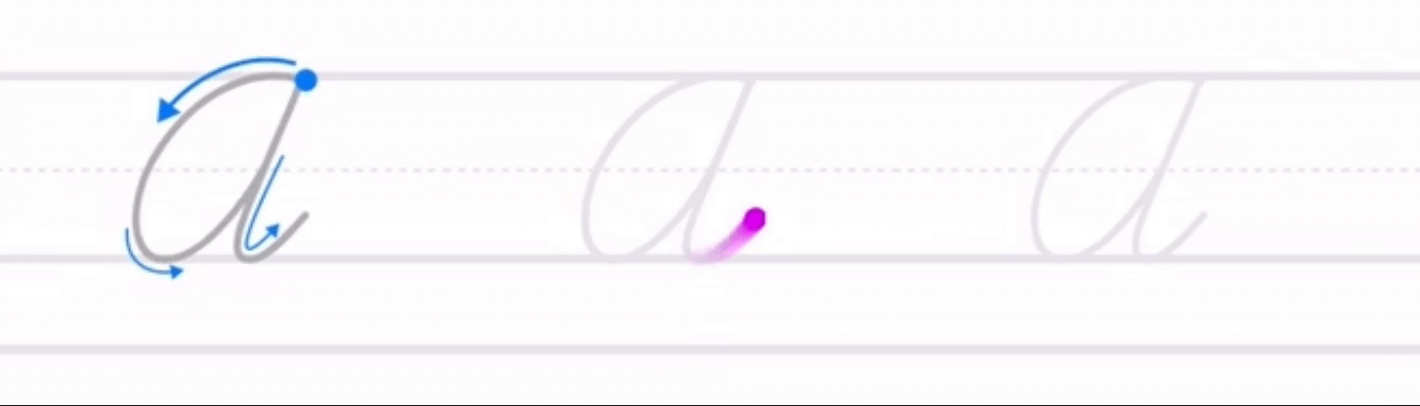
How to Connect Letter 'a' in Cursive:
Cursive writing is all about how smoothly one letter flows into the next, and the strokes you make for each letter. When you're connecting an uppercase cursive 'a' to the next letter, make sure the tail of the 'a' blends smoothly into it. This makes your writing look nice and easy to read. A smooth connection between letters makes your cursive writing look better overall.

This video is made to help you master the lowercase and uppercase cursive 'a' and connect the letter 'a' in cursive 'a'.
Cursive B
Cursive C
Cursive D
Cursive E
Cursive F
Cursive G
Cursive H
Cursive I
Stay tuned because we'll add the tracing and tutorial for cursive letters each week! Practice tracing these letters until you feel comfortable with their shapes and flow. Remember to maintain a relaxed grip on your writing instrument and to move your hand smoothly across the page. With patience and practice, you'll soon find yourself writing in cursive with confidence and style!